Build and Consume Alpine Linux vSphere Images
Deploying Linux for the impatient
If you've ever wanted to just "test something out really quick" in a live environment, Linux distributions have always been generally lightweight, but that's not the only implicit requirement for experimentation.
A Linux IaaS distribution should be:
- Reasonably secure (basic hardening applied, fewer packages == fewer vulnerabilities)
- Light on disk usage (shortening deployment times)
- Light on system resources, e.g. CPU/Memory
- Flexible (supports a package manager with a wide ecosystem of packages)
Package flexibility is usually the compromise made here - but when you're deploying programmable code, container images and virtual environments like Python's venv should be able to bridge some gaps.
Alpine Linux focuses on these goals - but doesn't compromise on automation. Combined with a dynamic inventory bootstrapping process, it's relatively straightforward to bring Alpine's APK ansible module into play to build any extra software on a new machine.
Customizing and building the ISO
First, let's upload the ISO to a datastore:
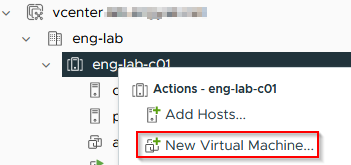
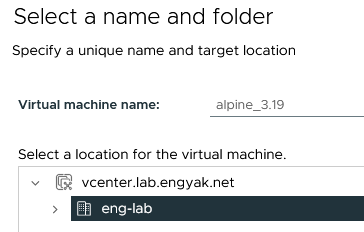
Let's create a new Virtual Machine. We'll attach the ISO to it
Target any storage and compute as preferred. SSD datastores will be faster, of course.
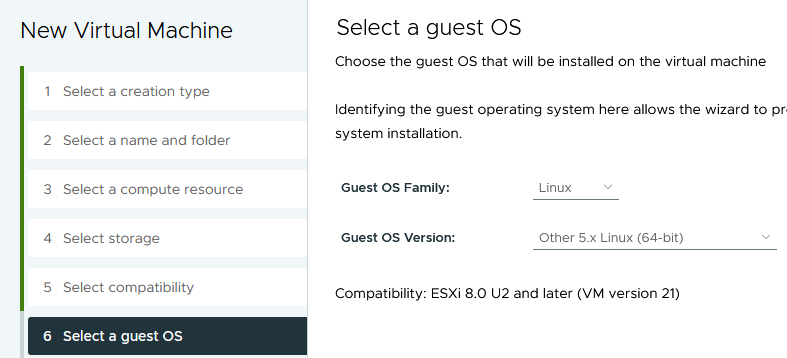
vSphere 8.0 Update 2 doesn't have a preset for Alpine Linux, and the guest OS options are important - it defines what paravirtualized hardware is available:
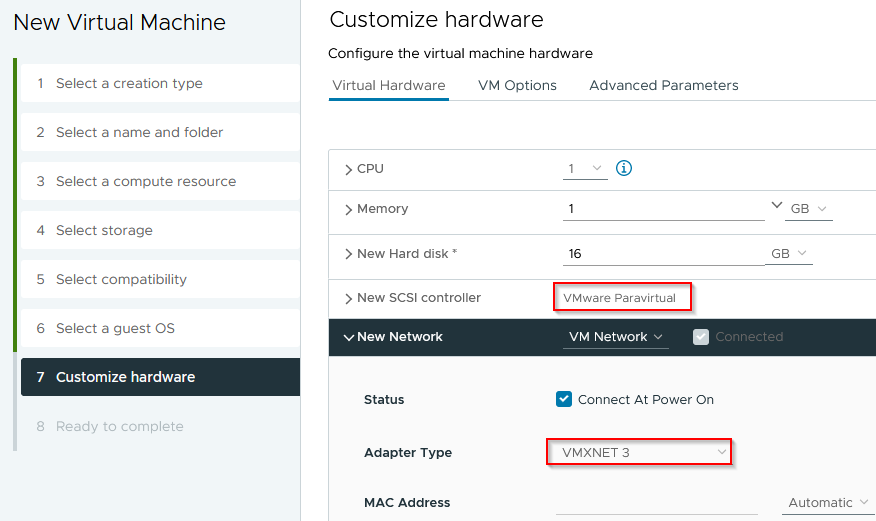
Ensure that VMXNET 3 and PVSCSI are both available. The "New Network" will become the default port-group assigned to the template.
CPU/Memory are mostly irrelevant, as the deployment pipeline can customize afterwards - and this OS doesn't need much in terms of resources:
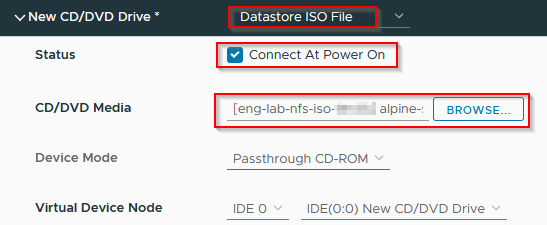
Select the Alpine "Datastore ISO" and enable "Connect and Power On" for the assigned CD/DVD drive:
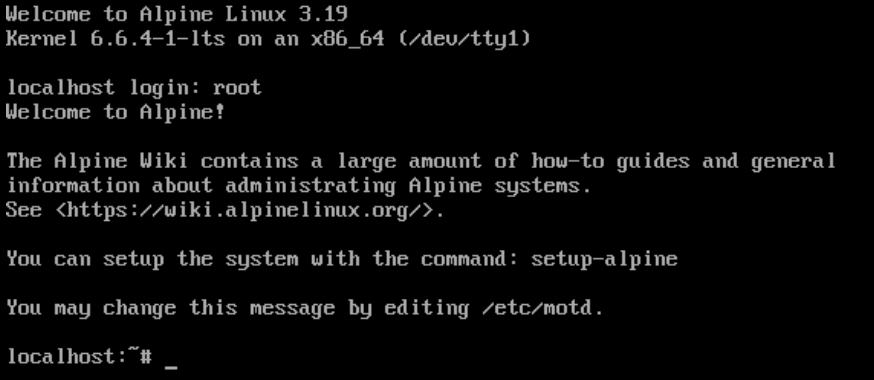
Start the machine - it'll boot to a command prompt very quickly. Log in as root:
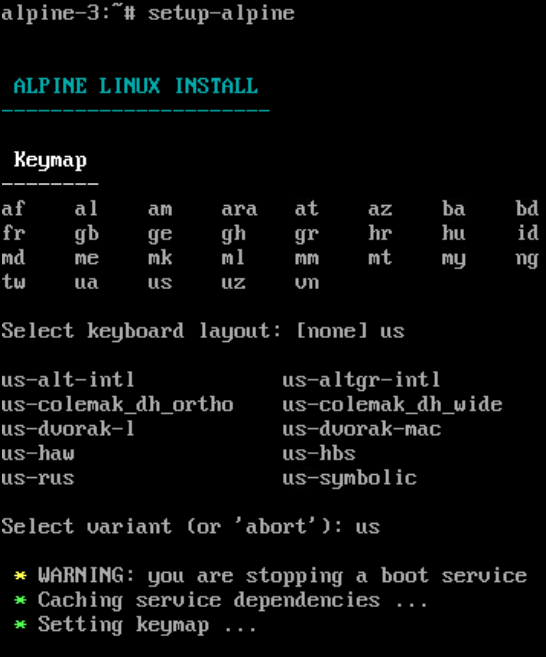
The installation guide indicates to use the setup-alpine script, and follow the prompts:
The majority of setup here is extremely simple - because it's not installing a bunch of software. GUIs are also possible after the installation is complete - but it does defeat the point.
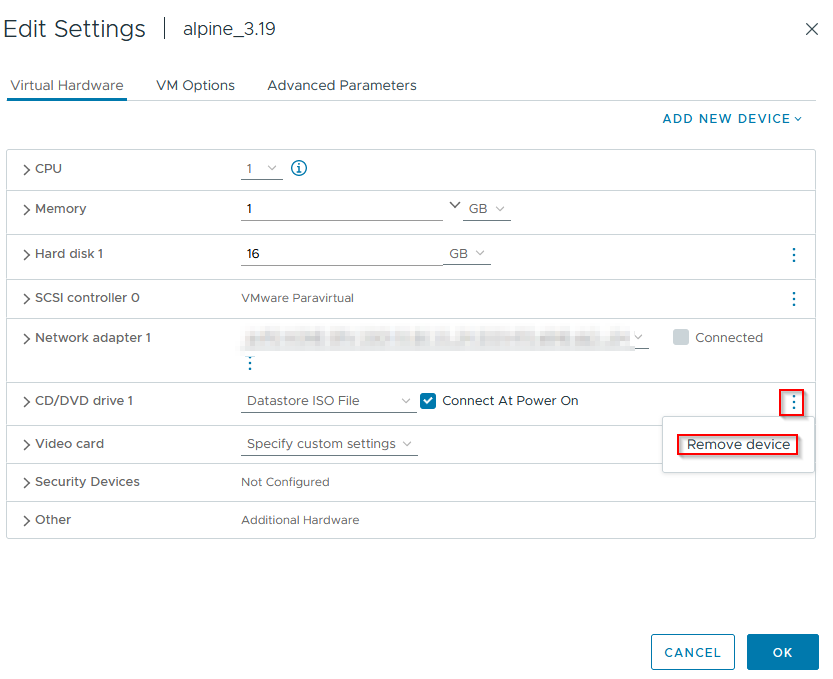
Instead of rebooting as instructed, shut the virtual machine down and delete the disk drive:
- Note: The shutdown process isn't installed with Alpine, and the following command does execute a graceful shutdown!
1shutdown now
Start the machine up - we'll want to add some quality of life improvements to this machine like guest tools:
1{{ insert favorite editor here }} /etc/apk/repositories
Remove the # from the line ending in /alpine/v{{ version }}/community and save.
Per Alpine's guide, install and enable open-vm-tools:
1apk add open-vm-tools open-vm-tools-guestinfo open-vm-tools-deploypkg
2rc-service open-vm-tools start
3rc-update add open-vm-tools boot
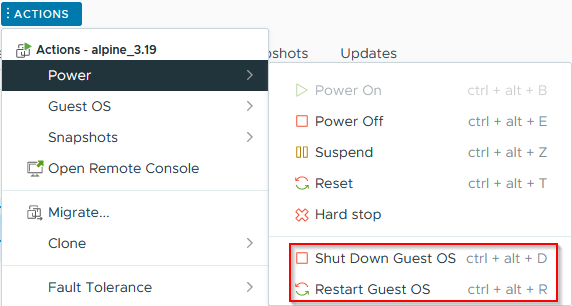
Once running, ensure that guest power actions are available:
Personally, I like testing, so instead of powering off the VM, I use the guest action to ensure everything is working. Either way, shut the VM down.
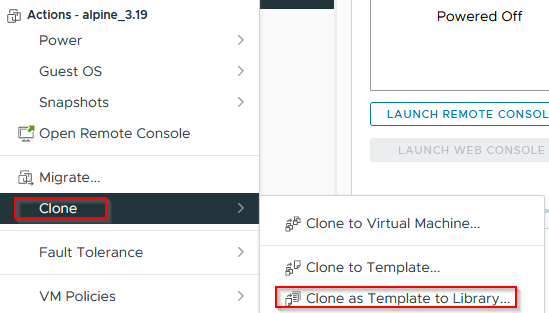
Hit "Actions" on the VM, or right click it, and select "Clone → Clone as Template to Library":
Select whatever storage backing and content libraries are preferable at this point. It won't take long to clone in. Delete the old VM whenever it makes sense, I usually do so after testing a deployment:
- Note: Set "Power on VM after creation" - this will clone _extremely quickly and boot even faster.
Modifying the deployment pipeline
The deployment pipeline code itself is available here. I've made some modifications from previous versions:
- GitHub Actions now supports the
choicetype, which means we can select UUIDs. There isn't a way to build a "friendly name" mapping. We achieve this by creating a "lookup dictionary" with the friendly name as a key and a UUID as the value. This list will need to be populated via data collection (featured below).
First, we'll need to find out what the UUID of the template and cluster are. Here's an example to collect the required information. The UUIDs of system resources (and this template) are only available via the API. Use this information to form the parameters.yml file created in the GitHub Action workflow, e.g. datastore, cluster, folder
Adjusting and running this workflow will allow an engineer to populate the previous workflow and expose vSphere assets to further deployment automation!
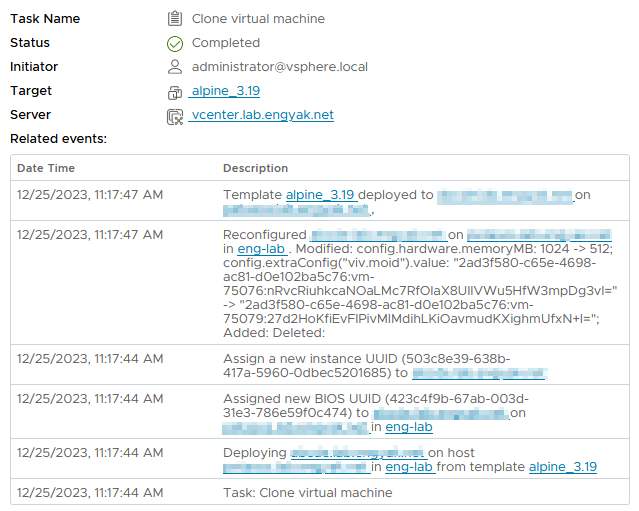
For reference, this machine deployed in about 3 seconds on a shared SSD (iSCSI):
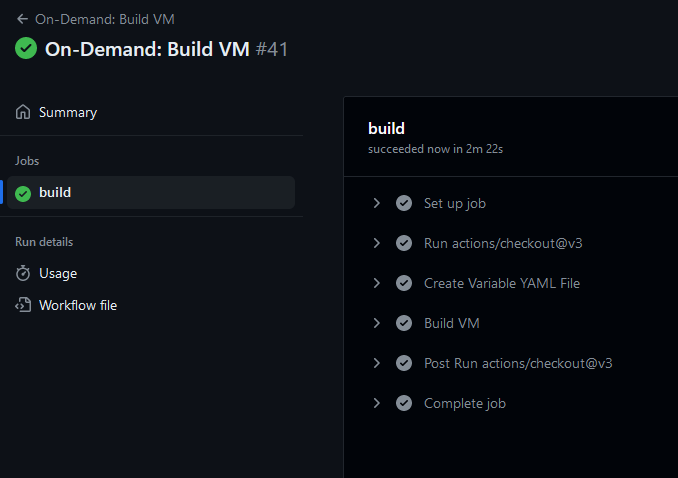
The GitHub workflow takes >2 minutes to complete, but the workflow it's attached to has manual wait step:

